.png?width=300&height=300&name=Untitled%20design%20(6).png)
An "Invalid Batch Sequence" error typically indicates a mismatch between the terminal’s batch sequence number and the number expected by the payment processor. This can happen for several reasons:
Before Making Any Changes: Retrieve PAX Logs
Both the LogCat and Detail logs must be uploaded before modifying settings.
LogCat Instructions
- Exit the BPOS
- Open the PAXSTORE
- Tap the hamburger menu (three horizontal dashed lines in the top-left corner).
- Select More.
- Select Upload Terminal Logcat.
- Select Logcat, then press Upload.
- Wait 20 seconds.
- Select Detail Log, then press Upload.
Detail Log Instructions
- Open the BPOS application.
- Select Func.
- Select Settings.
- Enter the password when prompted. (todays date)
- Select About BroadPOS.
- Select Log Upload.
- Exit the BPOS application.
- Open the PAXSTORE
- Tap the hamburger menu (three horizontal dashed lines in the top-left corner).
- Select More.
- Select Upload Terminal Logcat.
- Select Logcat, then press Upload.
- Wait 20 seconds.
- Select Detail Log, then press Upload.
Steps to Resolve the Error
1. Check for Unbatched Transactions
- Open the Payments Application
 Omaha or
  TSYS and select
 - Select Reports.
- Enter the password (Today's Date in MM/DD/YYYY format).
- Select Current Report.
- Then Click on Report Type and Choose Detailed Report aka: Journal Report, Report will print.
2. Clear the Database on the Terminal
- Open the Payments Application
 Omaha or
  TSYS.
TSYS. - Select Func → Settings.
- Enter the password (Today's Date in MM/DD/YYYY format).
- Select Other Settings.
- Choose Clear All or Clear Database.
- Confirm by clicking Yes when the terminal asks, “Are you sure?”
- The terminal should display Database Cleared.
3. Coordinate with EPI Tech Support
5. Update the Device ID in the PAX File
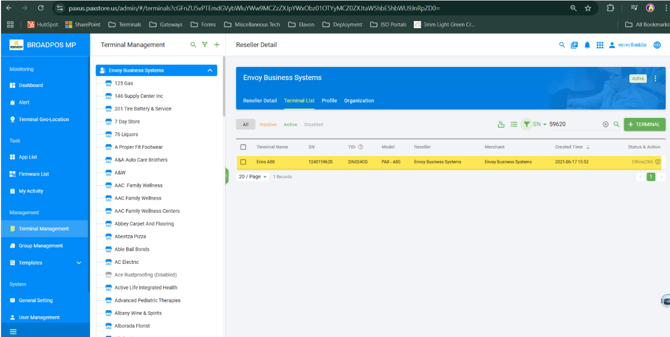
- Log in to the Paxstore using your credentials.

- Navigate to “Terminal Management”

- You can search for the terminal using either the DBA Name or the Serial Number.
- By DBA Name: Click the magnifying glass icon and type in the merchant's name.
Searching by Serial Number
To search by Serial Number:
- Type the serial number into the "Search by SN" field.
- Press Enter.
You can search using the full serial number or just the last four digits.
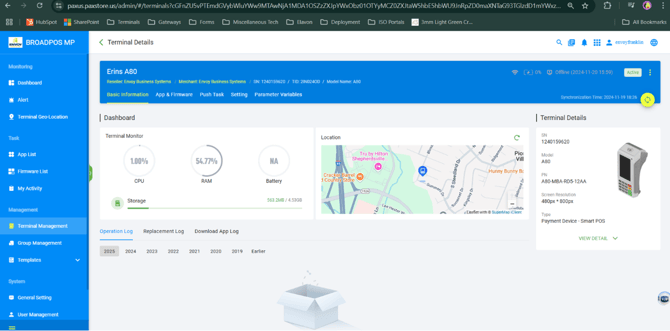
Selecting the Terminal
After entering the serial number and pressing Enter:
- Select the terminal from the list that appears.
- Below is an example of what you will see when you click on the terminal.
- Click “Push Task”
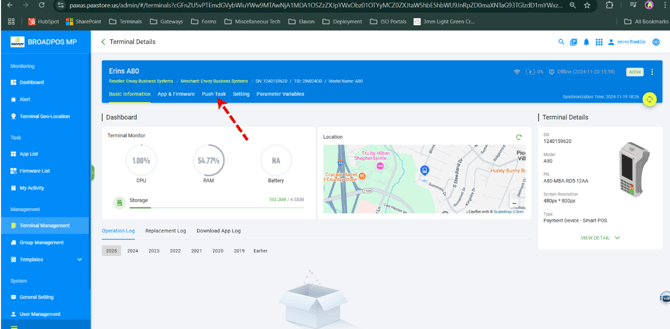
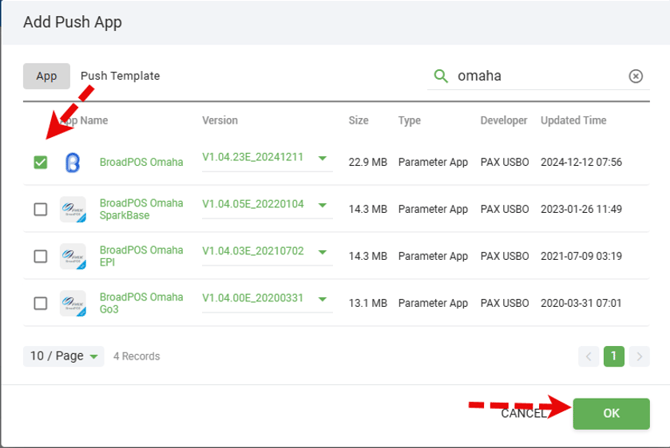
- Next, Click the green push app button on the right side of the screen.
- Next, type "Omaha" into the search field and press Enter.
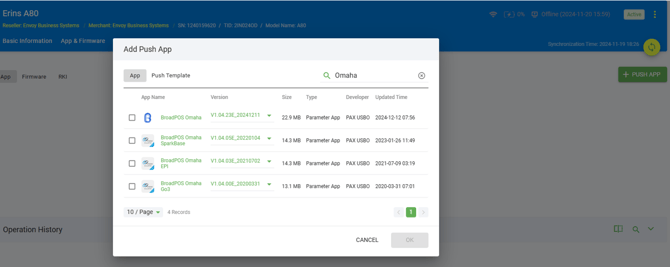
- Click the checkbox to the left of the top option, "Broadpos Omaha," and then click OK.
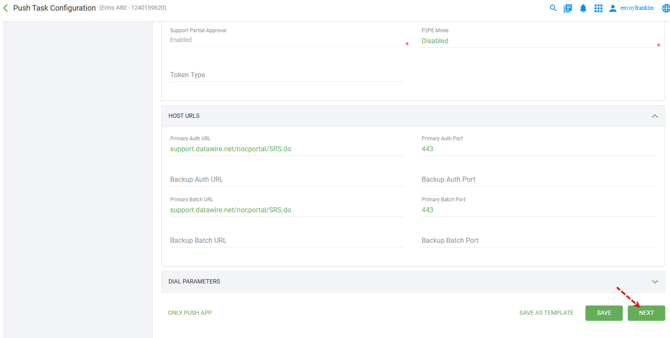
- Click on the First Data Omaha tab.

- Replace the old Device ID with the new Device ID.

- Click Next.
- Next, choose Activate.
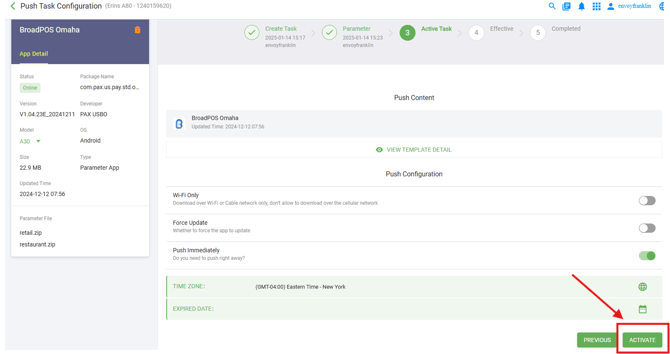
- Once completed, the screen will say Your Push Task has Succeeded.

-
- Open the Payments Application
 Omaha or
  TSYS and select Func
 - Navigate to Settings.
- Enter the password (Today's Date in MM/DD/YYYY format).
- Select Host Settings
- Select Host Register
- Click on Provision
- If it says Provision OK, they should do a test sale and batch.
- Open the Payments Application