.png?width=300&height=300&name=Untitled%20design%20(6).png)
Access Device Parameters
-
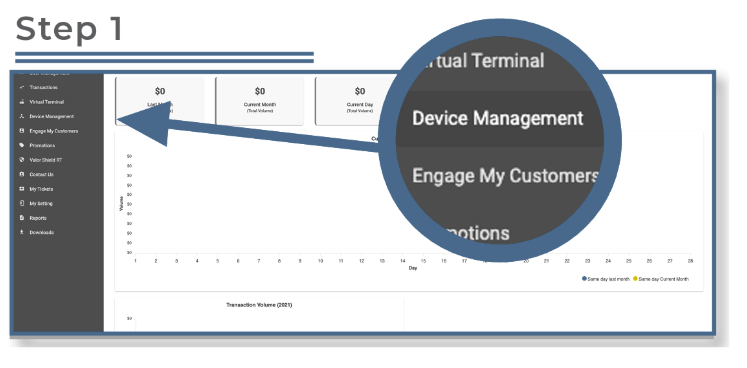
From the sidebar menu, select Device Management.
-
If your merchant account includes multiple stores, use the search bar to locate the desired store.
-
Once you find your store, click the ellipsis (⋯) icon in the top right corner of the device snapshot.
-
Select Edit Parameters from the dropdown menu.
Expand Value Added Services
-
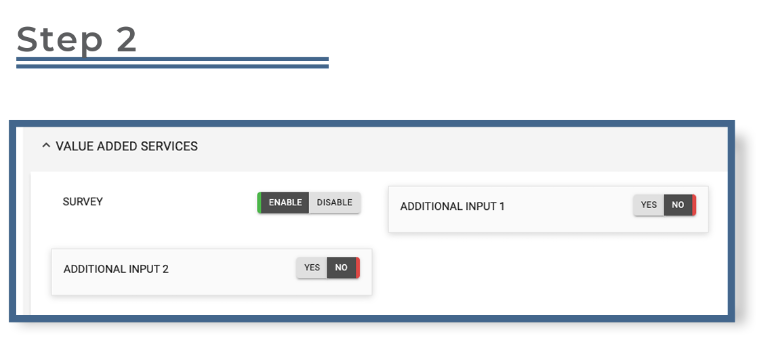
Scroll to the Value Added Services section.
-
Locate the Additional Inputs option — this allows you to configure up to two additional inputs per device.
Step 3: Configure Additional Inputs

-
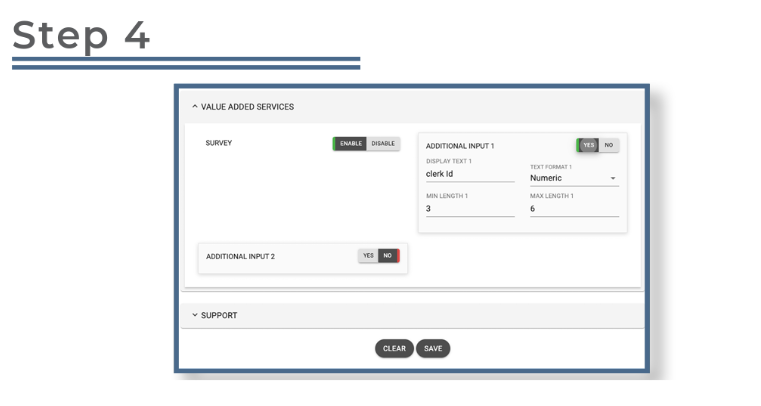
Toggle Additional Inputs ON to enable them.
-
You can customize each input by:
-
Renaming the Display Text (e.g., Clerk, Server, Invoice, etc.).
-
Setting the Input Type to Numeric or Alphanumeric.
-
Defining Minimum and Maximum Character Length.
-
Step 4: Save and Apply Changes
-
After configuring the inputs to your preference, scroll down and click Save.
-
On the terminal, perform a Partial Download to apply the changes:
-
Press ★ → 6 → OK.
-